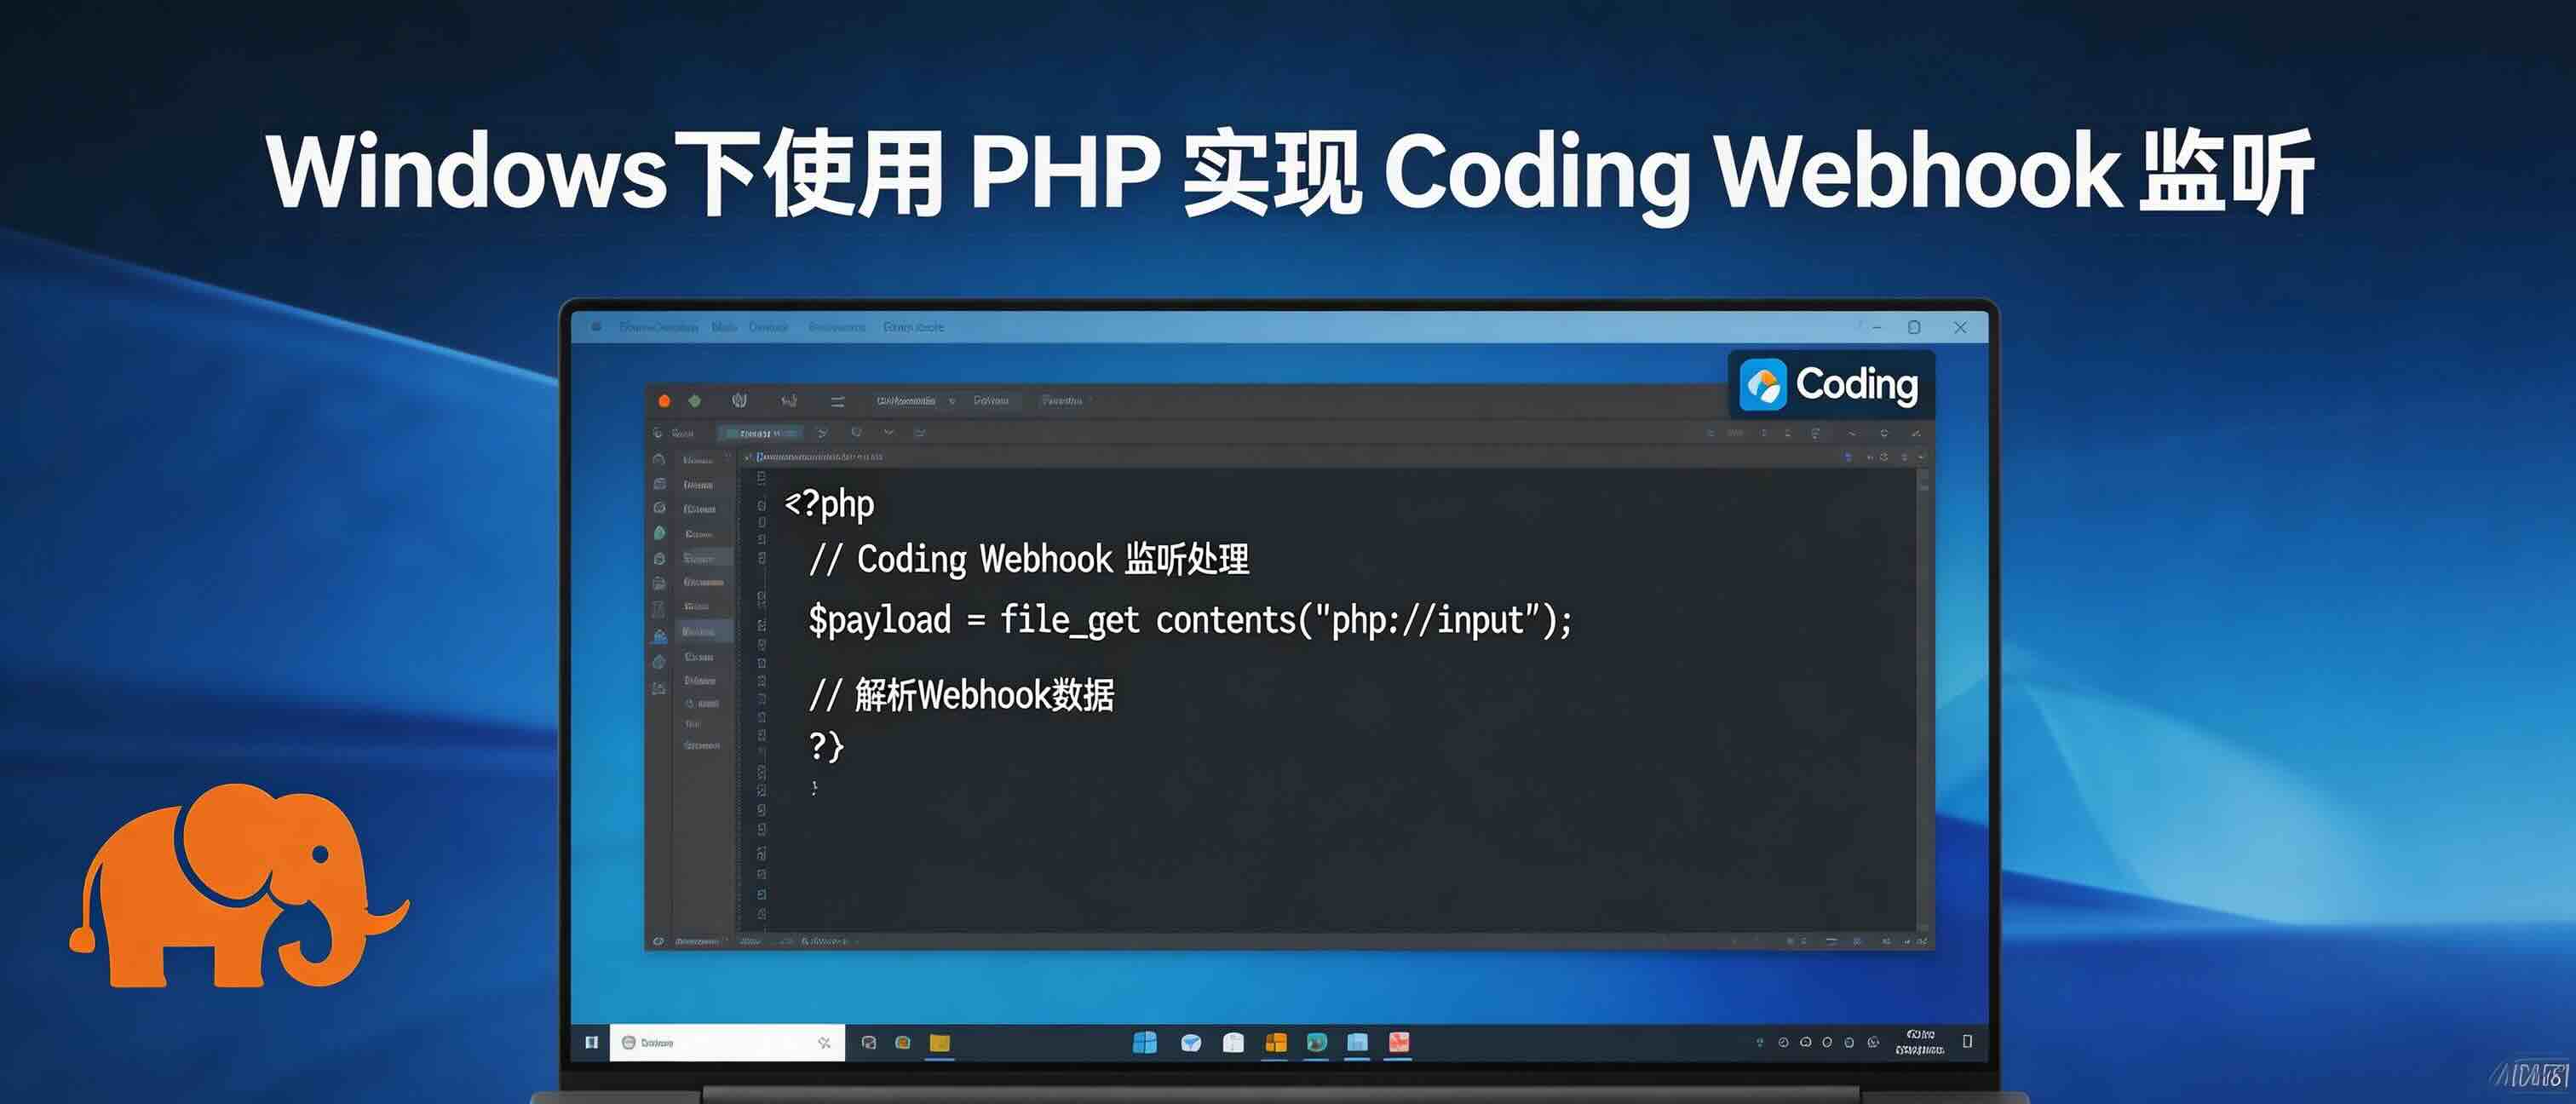
网上查了一堆教程都是 Linux 的,最后自己在 Windows 下尝试实现了项目自动部署,写个笔记记录一下..
这是新博客创建后写的第一篇文章,同时由于从未使用过 MarkDown 语法,还是花了不少的时间去适应的.. 网上找到一篇 Hexo Markdown 简明语法手册 ,作为参考
这篇文章假定你已经在 Windows 下安装好 Git 并设定好账号、项目部署目录,以及 先clone一遍。如果你还没安装,网上有一堆教程,这里就不再废话了。
WebHook 的原理就是当项目触发了指定事件时(例如push),Coding 会以 POST 方式请求你指定好的地址(你写好的 php 接口),其中包含了事件的相关信息,例如 pusher 信息,commit 信息等..
新建WebHook:首先在你的项目页面找到 "设置"-"WebHook"-"新建WebHook"

上图中我打码的那段链接就是我已经添加好的 WebHook
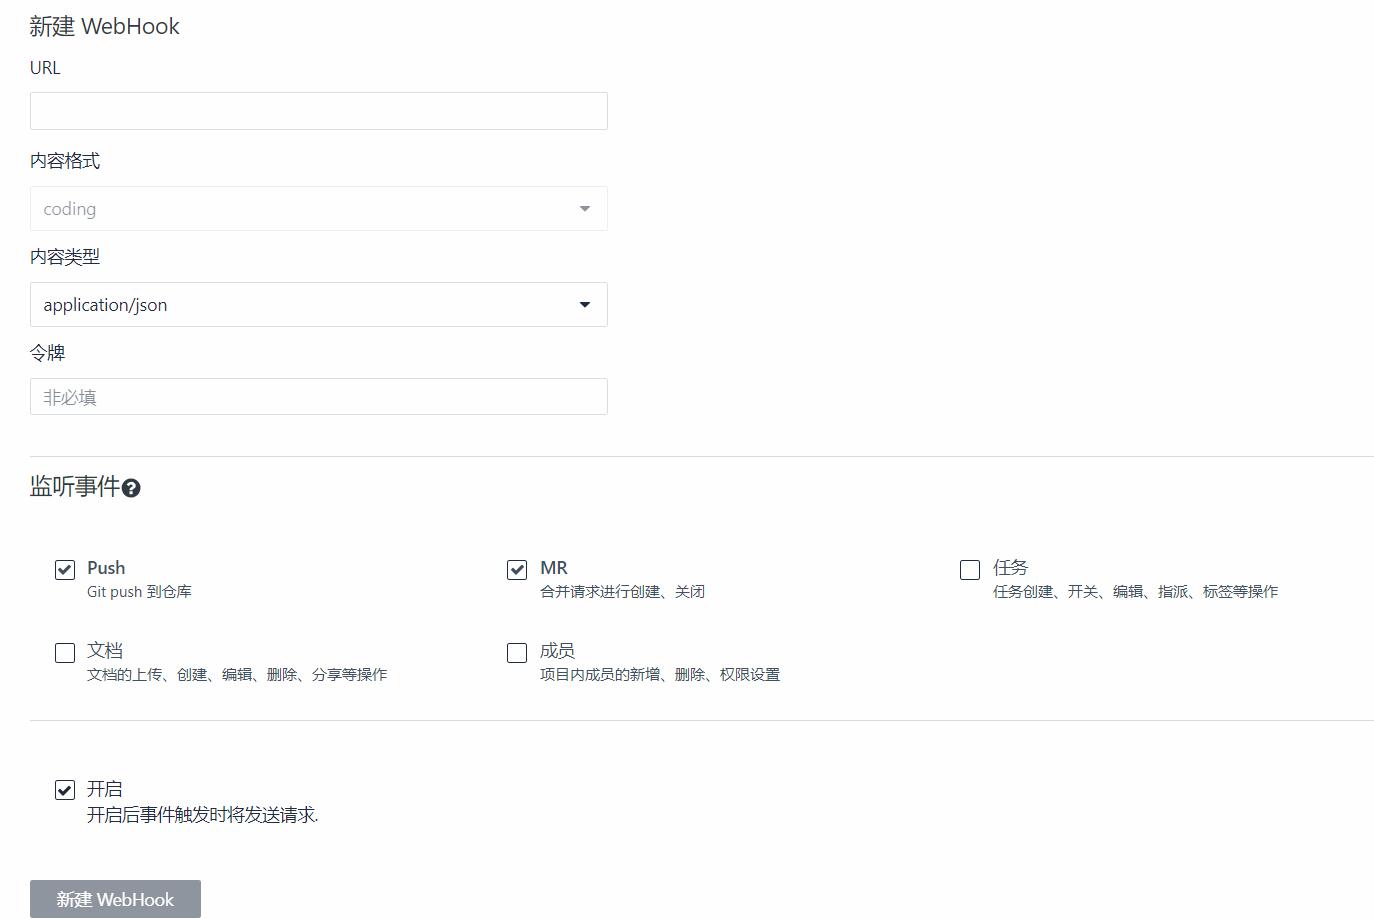
URL: WebHook访问的地址 内容类型: 选application/json 监听事件: 根据需要勾选
创建好后我们查看 Coding WebHook 开发文档 的 Push事件 的相关说明,了解请求信息的键值含义:
| Key | Value |
|---|---|
| hook_id | 当前 WebHook 的 ID |
| hook | 当前 WebHook 的配置数据 |
| ref | 推送的 commit sha |
| before | 该分支之前的 commit sha |
| after | 该分支新的 commit sha |
| compare | compare 的 url 地址 |
| commits | 更新的 commits 内容 |
| head_commit | 最新的 commit 内容 |
| pusher | 推送者 |
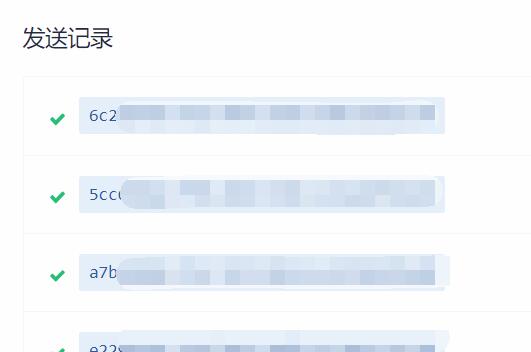
然后,你就可以去项目里随便触发一次 push 事件,之后到 "设置"-"WebHook"-"修改"里,点击发送记录,就可以查看 POST 请求的完整 JSON 数据。
这是一段请求例子:
请求头部
Request URL: http://yourserver/test/test_webhook.php Request method: POST User-Agent: Coding.net Hook X-Coding-Event: push X-Coding-Delivery: 6c228fe0-6f10-4f4e-85d5-88fe59b55534 X-Coding-WebHook-Version: v2 X-Coding-Signature: sha1=6acb186554d58b5e61c004ad2396601142fa9fdf
请求内容(部分信息已隐藏)
{
"ref": "refs/heads/master",
"before": "a2099911911e3f8a0090e5351b01b8952f5068fd",
"after": "3638f90bf79b2eb02259c4a2f594e362953a464d",
"created": false,
"deleted": false,
"compare": "...",
"commits": [
{
"id": "3638f90bf79b2eb02259c4a2f594e362953a464d",
"distinct": false,
"message": "push的信息\n",
"timestamp": 1543366074000,
"url": "相关commit页面",
"author": {
"name": "CrazyKidCN",
"email": "[email protected]",
"username": "..."
},
"committer": {
"name": "CrazyKidCN",
"email": "[email protected]",
"username": "..."
},
"added": [],
"removed": [
"testfile.txt" //此次push删除了一个文件
],
"modified": []
}
],
"head_commit": {
"id": "3638f90bf79b2eb02259c4a2f594e362953a464d",
"distinct": false,
"message": "test add push\n",
"timestamp": 1543366074000,
"url": "...",
"author": {
"name": "CrazyKidCN",
"email": "[email protected]",
"username": "..."
},
"committer": {
"name": "CrazyKidCN",
"email": "[email protected]",
"username": "..."
},
"added": [],
"removed": [
"testfile.txt"
],
"modified": []
},
"pusher": { //推送人信息
"name": "...",
"email": "...",
"username": "..."
},
"sender": {
"id": ..., //Coding 用户ID
"login": "...", //Coding 用户名称
"avatar_url": "...", //Coding 用户头像
"url": "...",
"html_url": "...",
"name": "CrazyKidCN",
"name_pinyin": ""
},
"repository": {
"id": ..., //repo id
"name": "...", //repo名称
"full_name": "", //repo全名
"owner": { //repo所有者
"id": ...,
"login": "CrazyKidCN",
"avatar_url": "https://dn-coding-net-production-static.qbox.me/837a90ac-5efb-4f67-bbed-11178d80c683.jpg?imageMogr2/auto-orient/format/jpeg/crop/!596x596a0a0",
"url": "...",
"html_url": "https://coding.net/u/CrazyKidCN",
"name": "CrazyKidCN",
"name_pinyin": ""
},
"private": true,
"html_url": "...", //repo地址(html超链接形式)
"description": "",
"fork": false,
"url": "...", //repo地址
"created_at": 1523760758000,
"updated_at": 1523760758000,
"clone_url": "...",
"ssh_url": "...",
"default_branch": "master"
}
}
然后我们就可以开始写 php 来解析其中的 json 了。下面以实现触发 push 事件后自动部署项目为例子,我的代码:
$header = get_all_header(); //获取头信息
$json = json_decode(file_get_contents('php://input'), true); //解析json
//验证信息是否正确
if (strcmp($header["user-agent"], "Coding.net Hook")==0 &&
strcmp($header["x-coding-event"], "push")==0 &&
strcmp($json["repository"]["name"], "项目名称")==0 )
{
//区别于Linux系统的地方
$shell = 'cd C:/test && "C:\Program Files\Git\cmd\git.exe" pull 2>&1';
//运行命令
exec($shell,$out);
//输出git结果到log.txt
file_put_contents("log.txt", "\nGit output: ".$out."\n");
}
exit("");
function get_all_header()
{
$ignore = array('host','accept','content-length','content-type');
$headers = array();
foreach($_SERVER as $key=>$value){
if(substr($key, 0, 5)==='HTTP_'){
$key = substr($key, 5);
$key = str_replace('_', ' ', $key);
$key = str_replace(' ', '-', $key);
$key = strtolower($key);
if(!in_array($key, $ignore)){
$headers[$key] = $value;
}
}
}
return $headers;
}
区别于网上Linux系统的教程,最关键的一句话是:
$pull = 'cd C:/test && "C:\Program Files\Git\cmd\git.exe" pull 2>&1';
其中, cd C:/test 为切换到你的项目部署目录, "C:\Program Files\Git\cmd\git.exe" pull 等同于 git pull,只不过手动指定了git程序的地址。最后的 2>&1 解决无法正确输出 $out 的问题。
这样,就实现了push后自动部署项目了。。。
后续:进一步获取commit中文件的变动详情,从而实现更多针对性的操作,我的代码:
for ($j=0; $j<count($json["commits"]); $j++){ //由于一次可push多个commit,所以要遍历数组
file_put_contents("log.txt", "File added:".count($json["commits"][$j]["added"])."\n", FILE_APPEND);
for ($i=0; $i<count($json["commits"][$j]["added"]); $i++){
file_put_contents("log.txt", $json["commits"][$j]["added"][$i]."\n", FILE_APPEND);
}
file_put_contents("log.txt", "File removed:".count($json["commits"][$j]["removed"])."\n", FILE_APPEND);
for ($i=0; $i<count($json["commits"][$j]["removed"]); $i++){
file_put_contents("log.txt", $json["commits"][$j]["removed"][$i]."\n", FILE_APPEND);
}
file_put_contents("log.txt", "File modified:".count($json["commits"][$j]["modified"])."\n", FILE_APPEND);
for ($i=0; $i<count($json["commits"][$j]["modified"]); $i++){
file_put_contents("log.txt", $json["commits"][$j]["modified"][$i]."\n", FILE_APPEND);
}
}
以上!
由于本人仍在学习 git 和 php ,文章难免存在错误,请各位大佬多多指教,感谢ww
博客的第一篇文章完工,成就感满满的呢~